


Congratulations on bringing the art of espresso to your home with your new Rancilio Silvia Espresso Machine!
It is important to carefully read the enclosed instructions as well as complete the warranty card included and return it to the manufacturer.
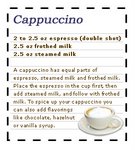
As we know, you are anxious to taste your first espresso or creamy cappuccino, so we have listed our tips to coffee perfection!
Helpful Tips for using your Rancilio Silvia
Numbers in brackets refer to Fig. 1 of manufacturers manual
Fill the water tank (only use filtered water in your espresso machine as hard water may react to metals in your machine which can cause blockages). Always make sure there is plenty of water in the tank.
Plug the machine in and turn it on by the main switch. Turn the power switch on (1). Turn the coffee switch on (3). This will dispense water out of the group head and fill the boiler up to its maximum level ready to brew. Once you have a steady flow of water out of the group head (approx 10 / 15 sec’s), turn the coffee switch off (3). This step is very important to insure the boiler is filled with water.
Turn the steam switch on (5) when the heating light (2) switches off, the machine is ready to froth milk.
Frothing milk may take a little practice. We recommend you “bleed” the steamer. This is done by switching the steam button (5) on and turning the knob (6). Turning the knob will release a steady stream of boiling water, this however will shortly turn into steam.
You can now start frothing your milk. After frothing you must then turn the steam knob (6) back to the off position and then switch off the steam button (5). It is imperative that both these steps be done for the longevity of your machine. If the steam button (5) is left on it will continue to produce steam and may boil dry.
The steaming function in your machine forces the machine to build up pressure and can empty the boiler. We recommend that you refill the boiler after frothing your milk by turning the coffee switch (3) on. This will release excess steam, the steam will then turn into a steady stream of boiling water. Turn coffee switch (3) off.
Fill handle with ground coffee (please use scoop provided): 1 scoop for 1 coffee, 2 scoops for 2. Please remember to use the correct filter. A light tamper is all that is needed.
Place handle into the group head and turn as far to the right of the machine as you can. Turn on the coffee switch (3) this will start the machine as you can. Turn on the coffee switch (3) this will start the coffee pouring through.
Empty the group handle, it is now safe to turn off your machine as you can continue to make coffee starting again at step 3. Don’t forget to refill the boiler.
Add milk and foam as required to your coffee beverage.
Water button (4) can also be used for tea, this is released from the steam arm when turning knob (6). Remember to close knob (6). Remember to close knob (6) and switch off water button (4). The top of the machine can be used as a heating tray for cups.
Please read the manufacturers use and maintenance instructions before using you machine.
Most importantly have fun and enjoy your coffee experience!
Helpful hints for Milk Frothing
The art of frothing and steaming milk is a long and slow process to learn. The technique has to be developed and this can only be achieved by practice and perseverance.
Many factors come in to play when creating the perfect pitcher of froth.
The type of milk used will affect the frothing process. Whole milk will develop froth with more body, but low fat milk is easier to froth.
The higher the fat content in the milk the longer it takes to froth and harder it is to produce a creamy texture without burning the end product – that is why it is so easy to froth skim or soy milk.
Fill the steaming jug 1/3 full of cold fresh milk. The fresher the milk the better it froths, the colder the milk the better it also steams, if possible keep your steaming jug chilled. Warm, hot or old milk will not froth.
Before frothing milk turn on the steam arm for a few seconds this will release any build up of water condensation (this is called bleeding) and prevents the milk being diluted. Direct the steam arm into the drip tray to avoid being scolded by the moisture that may have condensed in the pipe.
Use one hand to hold the jug by the handle. With the other hand turn on the steam arm. Move your hand to the bottom of the jug to act as a thermometer. As soon as the jug is too hot to hold remove you hand so you don’t burn yourself.
Position the jug, under the steam arm. For your safety totally immerse the arm in milk. Turn on the steam arm, when the steam has begun to release lower the jug so the nozzle is 5-10mm below the surface of the milk.
Centre the steam arm in the jug. The jug should only be moved in a downward motion. The end of the steam arm (the nipple) is to remain at the top of the milk. Create a whirlpool effect, the milk will be forced up by the steam, the jug should be moved down in one slow motion. This should continue until the milk has reached the top of the jug. Your hand should remain at the base of the jug until you feel it is hot. Remove your hand if the heat is uncomfortable.
Remember once the correct temperature is reached stop frothing. The milk rises in temperature by another 5 degrees as the steam releases from the jug. If you over-heat your milk it will taste, look and smell burnt, ultimately ruining your finished coffee.
This method provides thick closely bubbled/dense milk. No large air bubbles should form, large bubbles will dissipate rapidly and our milk will fall. Underneath the foam you should have steamed milk to the bottom of the pitcher.
Turn the steam valve off before removing the steam arm from the jug to avoid splattering of hot milk.
Wipe the steam arm with a wet cloth immediately to remove the milk coating before it hardens. It is essential that the steam arm remain clean at all times. Do not soak the steam arm.
Trouble Shooting – What can go wrong?
Milk suddenly won’t froth?
During April and May as well as September, milk becomes difficult to froth. The higher level of fat/lactose in the milk due to the cows calving increases the milk density making it much more difficult to create foam. Another factor, which often effects milk, is different “feed” given to cattle often during unseasonable times. This will also have an effect on lactose level and even the flavour.
The Milk is too hot – the foam is dissipating
Once the milk has been overheated it will not froth. That is shy it is essential that the temperature of the milk be monitored at all times.
How do you know the milk is too hot or burnt?
The milk no longer rises in the jug. The jug will be extremely hot naturally. The milk has a slight yellow colour and smells like burnt custard.
How many times can we reheat the milk and can I add milk to the steam jug?
A maximum of 2 times then throw it away, Milk can be added however it must be cold. When we foam milk we are stretching and expanding the milk to create foam, the milk can only be “pulled” and expanded twice to retain its density and flavour.
Can I create froth with hot or warm milk?
No, only cold milk, however the milk can be reheated but no froth will form.
Old milk creates better froth?
This is an old wives tale the fresher the milk the better the froth. The colder the milk the better the density of the finished foam.


No comments:
Post a Comment